
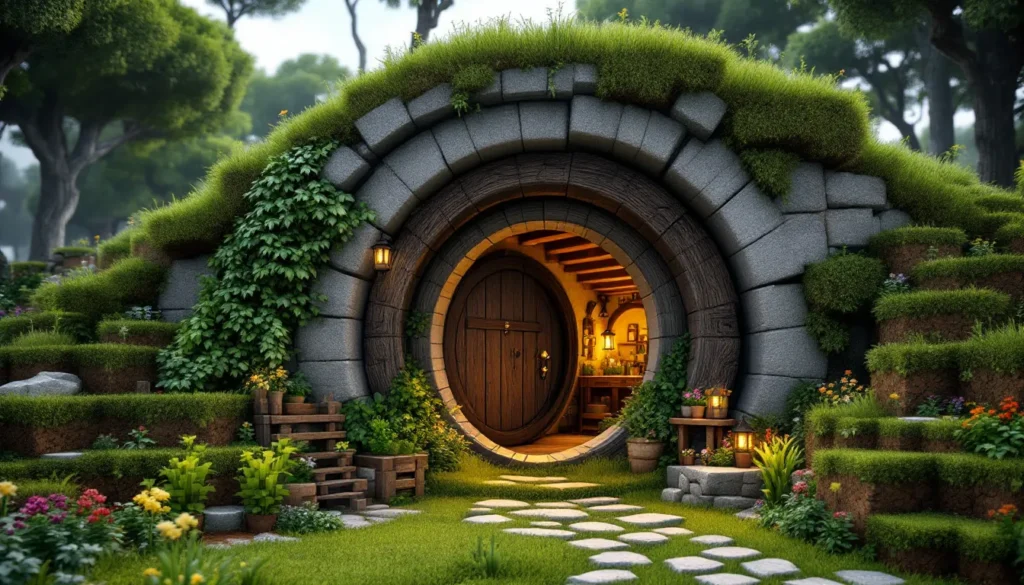

Building a Minecraft hobbit hole is one of those projects that seems intimidating at first but becomes incredibly rewarding once you understand the basics. Whether you’re recreating the cozy burrows from Middle-earth or just want to build something that feels lived-in and charming, a hobbit hole is the perfect blend of creativity and practicality. The rounded architecture, earth-toned materials, and intimate interior spaces create a building style that stands out in any Minecraft world. In this guide, we’ll walk through every step, from site selection and material gathering to the final decorative touches, so you can construct a hobbit hole that feels authentic and impressive. By the end, you’ll have a structure that’s not just visually appealing but also functional as a home base or creative showpiece.
Table of Contents
ToggleKey Takeaways
- A Minecraft hobbit hole requires careful site selection on a gentle hillside with terrain manipulation skills, rounded architecture, and earthy materials like dirt, wood, and stone to achieve authentic appeal.
- The entrance arch is the signature element and should be 4–5 blocks wide and 3–4 blocks tall with a semicircular shape, framed with dark oak or spruce wood, and enhanced with weathering details like vines.
- Interior success depends on proper proportions (3–4 block ceilings, 6–8 block width) divided into functional zones—living area with fireplace, sleeping alcove, kitchen nook—using furniture placement rather than walls.
- Strategic lighting using lanterns, candles, and glowstone placed every 8–10 blocks prevents dark, unwelcoming interiors and is the most commonly overlooked element in hobbit hole builds.
- Finishing touches like exterior landscaping, a functioning chimney, weathering textures, and personal narrative details transform a basic structure into an impressive showpiece that feels genuinely lived-in.
- Common mistakes to avoid include poor proportions, bright clashing colors, flat terrain builds, undersized spaces, and forgetting the roof—mastering these prevents hours of frustration and rework.
What Is A Minecraft Hobbit Hole?
A Minecraft hobbit hole is a round, underground dwelling inspired by the homes of hobbits in J.R.R. Tolkien’s Middle-earth. These structures are characterized by a semicircular entrance built into a hillside, earthy color palettes, and compact interiors filled with warmth and personality. Unlike typical Minecraft houses, hobbit holes prioritize organic, curved designs over rigid rectangular shapes.
The signature elements include a circular or oval entrance arch, interior rooms excavated horizontally into terrain, and materials like dirt, wood, grass, and stone that blend naturally with the landscape. Some builders add distinctive touches like round doors, porthole windows, and mushroom decorations to enhance the whimsical feel. The style has become popular in creative Minecraft communities, and countless tutorials and inspiration builds exist on platforms like modding communities and build guides where builders share their designs.
What makes hobbit holes appealing to Minecraft players is their departure from cookie-cutter rectangular houses. They reward careful planning, terrain manipulation, and attention to detail, making them a satisfying long-term project for builders of all skill levels.
Why Build A Hobbit Hole In Minecraft?
Building a hobbit hole offers several distinct advantages within Minecraft gameplay and creative expression. First, it transforms your base from purely utilitarian into a focal point, something worth showing off in screenshots or multiplayer servers. The curved architecture and themed design create visual interest that flat, boxlike structures simply can’t match.
Second, hobbit holes encourage exploration of terrain manipulation mechanics. You’ll learn to use Minecraft’s building tools more intuitively: how to shape hillsides, carve interiors, and work with elevation changes. These skills transfer to other large-scale projects, from mountain bases to underground bunkers.
Third, the aesthetic fits multiple gameplay styles. Whether you’re playing vanilla survival mode, using creative mode for artistic freedom, or even incorporating mods, a hobbit hole works as a cozy home base, an underground farm entrance, or a decorative landmark. Players running survival worlds often use hobbit holes as inspiration for how they reorganize their home base around a central theme.
Finally, building one is genuinely fun. The project breaks up routine Minecraft activities and provides a clear, achievable goal with visible progress. Completing a detailed hobbit hole feels like a real accomplishment, especially if you’ve paid attention to proportions and interior design.
Finding And Preparing Your Building Location
Your location makes or breaks the hobbit hole build. A poorly chosen spot forces you to fight the terrain: the right spot lets the landscape work with your design.
Choosing The Right Biome
The ideal biome for a hobbit hole is one with moderate rolling hills and grassland, think grassland plains, meadows, or forest biomes with gentle elevation changes. Avoid flat plains, as they give you no natural hill to build into. Similarly, skip extremely mountainous or snow-heavy biomes unless you’re prepared for significant terraforming.
Best biome options:
- Grassland or plains: Soft, buildable terrain with grass blocks
- Forest biome: Natural cover with trees for materials and aesthetic appeal
- Meadow biome: Gently rolling, pre-shaped terrain that requires minimal flattening
- Rolling hills variant: Specifically designed with bumps and valleys
Bad biome choices:
- Desert, savanna, or tundra (clashes visually and lacks suitable materials)
- Extreme hills or mountains (too steep for a natural hobbit hole entrance)
- Flat plains (no hill to carve into)
Once you’ve identified a biome, scout for a location with a hill that’s roughly 8–12 blocks tall with a gentle slope. This gives you enough room for a proper entrance arch and interior depth without excessive digging.
Flattening And Leveling Your Terrain
Odds are the terrain won’t be exactly right, so prepare to reshape it. Start by creating a clear, flat working area in front of where your entrance will be. This is where visitors will approach from, so it should feel intentional and welcoming.
Steps for terrain preparation:
- Mark the center point where your entrance arch will be using a beacon, block, or mental landmark
- Flatten a 5–7 block deep area in front of this point using a pickaxe or shovel. This creates an outdoor “porch” space
- Smooth the hill slope so it transitions naturally from flat ground to the hill: harsh cliffs look unnatural
- Build up or remove blocks around the entrance to frame it, some builders create a small retaining wall from wood or stone to define the space
- Double-check elevation by standing in front of the entrance: the arch should feel like it’s emerging from the hill at a natural angle
Take your time here. A sloppy terrain prep will make the final hobbit hole feel forced, no matter how detailed the interior is. If you’re playing in survival mode, consider using creative mode briefly to plan the layout before you commit to digging, it saves countless blocks of wasted effort.
Essential Materials And Resources
Gathering materials before you start building prevents frustrating mid-project breaks. A typical hobbit hole requires hundreds of blocks, so preparation is non-negotiable.
Block Selection For Authenticity
The material palette is crucial to selling the hobbit hole aesthetic. Here’s what works:
Primary blocks (use these liberally):
- Dirt & grass blocks: The foundation of the hill and interior flooring
- Oak or dark oak wood: Door frames, exposed beams, furniture
- Oak planks: Interior walls, ceilings, decorative panels
- Spruce wood: Darker accents, roof shingles, fine details
- Stone, andesite, or cobblestone: Interior walls for texture, foundation support
- Grass path blocks: Indoor “groundwork” for organic flooring
Accent blocks:
- Brown concrete powder or brown terracotta: Chimney details
- Mushroom blocks (brown/red): Decorative touches around the entrance
- Farmland blocks: Garden areas outside
- Gravel or coarse dirt: Exterior landscaping
Blocks to avoid or use sparingly:
- Bright colored blocks (lime green, pink, bright blue)
- Nether blocks, end blocks, or futuristic materials
- Anything that clashes with earthy, natural tones
The key is consistency. Stick to a warm, natural palette, think autumn leaves, rich soil, and aged wood.
Gathering Tools And Building Supplies
Before you break ground, ensure you have:
- Pickaxes: At least one stone or iron pickaxe for digging (or diamond if survival)
- Shovels: For fast dirt/grass harvesting
- Axes: Oak and dark oak axes to fell trees quickly
- Building blocks: Chest full of each primary block listed above
- Decor items: Doors, trapdoors, stairs, slabs, buttons, signs
- Lighting: Lanterns, candles, or glowstone for interior illumination
If you’re in survival mode, prioritize gathering:
- 500+ dirt blocks
- 200+ wood planks
- 150+ stone or cobblestone
- 50+ oak or dark oak logs (for doors, beams)
If you’re in creative mode, you’ve got everything available instantly, so focus on the design instead.
Most builders find it helpful to deposit materials in a nearby chest before starting. This prevents inventory chaos and keeps you focused on the build itself.
Building The Hobbit Hole Structure
Now for the actual construction. This is where planning pays off, rushing here leads to awkward proportions and frustration.
Creating The Rounded Entrance And Arch
The entrance is the signature element of any hobbit hole. Get this right and the rest flows naturally.
Design the arch shape:
- Stand where your front “porch” is and visualize the opening, it should be 4–5 blocks wide and 3–4 blocks tall to feel appropriately scale
- Use wooden planks or logs to outline the arch on the hillside. This acts as a guide
- The arch should be semicircular or oval, not rectangular. Round is key
- Make the edges slightly irregular, nature isn’t perfectly symmetrical
Carve out the entrance:
- Remove dirt blocks to create the rough arch opening
- Build the frame using wood logs (dark oak looks more aged). Position them along the arch perimeter
- Leave gaps between logs so you can see the interior, this makes it feel less claustrophobic
- Add supporting beams across the interior top of the arch for structural realism
Add a round door:
- Install a 3×3 or 3×4 dark oak door in the center opening (using multiple door blocks if necessary)
- Frame it with dark oak or spruce planks
- Add a small porch or step leading up to the door to increase visual impact
The entrance should look aged and organic, not brand new. Consider adding vines, small bushes, or weathered wood textures to enhance this.
Excavating And Shaping The Interior
Once the entrance is solid, start removing interior blocks. This is tedious but critical, carve too shallow and it feels cramped: carve too deep and it loses charm.
Interior dimensions:
- Main room depth: 10–15 blocks back from the entrance
- Ceiling height: 3–4 blocks (hobbits are short: Minecraft ceilings are typically 3 blocks)
- Width: 6–8 blocks across
Steps for excavation:
- Remove dirt blocks layer by layer. Don’t dig straight back in a line: create slight variations in the floor elevation
- Leave some walls thicker on one side (for stability and visual weight)
- Plan for multiple rooms: a main living space, a bedroom alcove, a kitchen nook. These don’t need to be separate chambers: they can be defined by how you arrange furniture and décor
- Create subtle elevation changes inside, higher platforms for sleeping areas, slightly sunken kitchen spaces
Constructing Walls, Ceilings, And Floors
Once the rough interior is carved, finish the surfaces.
Wall construction:
- Use a mix of dirt blocks, stone, and wood to create visual interest
- One accent wall (like darker stone or wood) prevents monotony
- Leave the top of walls slightly irregular, add random protruding blocks
- Consider adding small alcoves by indenting walls 1–2 blocks
Ceiling treatment:
- Exposed wood beams (logs running perpendicular to the entrance) look fantastic
- Mix wooden planks with stone for a patched, aged look
- Add small holes or gaps for atmospheric effect, hobbit homes feel organic
- Install lanterns hanging from the ceiling for integrated lighting
Flooring:
- Use grass paths, dirt, wood planks, or carpet for comfortable footing
- Avoid uniform block patterns: mix materials to create natural wear patterns
- Add depth variations, slightly sunken fireplace hearths, raised sleeping platforms
Take your time here. The interior surfaces are what visitors see most, so details matter more than speed.
Interior Design And Furnishing
An empty hobbit hole is just a cave. Furnishing transforms it into a home.
Creating Cozy Rooms And Spaces
Divide your interior into functional zones using furniture placement and subtle height changes rather than walls. This maintains the open, airy feel while defining purpose.
Living area:
- Center around a small fireplace (3×3 blocks with a chimney running up to the exterior)
- Place seating: wooden benches, stairs arranged as couches, or carpet areas
- Add a bookshelf or weapon rack for atmosphere
Sleeping alcove:
- Raise a platform 1–2 blocks above the main floor
- Place a bed, nightstand (small table made from wood), and lantern for bedside lighting
- Use dark wood or curtains to make it feel private and intimate
Kitchen/dining area:
- Slightly lower or offset from the main room
- Include a crafting table, furnace, and cooking setup
- Add a dining table (could be a wood slab on fence posts)
Storage/pantry:
- Line one wall with chests, barrels, or shelving
- Use darker wood to recede visually
- Label chests with signs if playing multiplayer
The key is proportional scale. Remember that hobbits are shorter than players, so keep ceilings cozy (3 blocks max) and furniture compact.
Adding Furniture And Decorative Elements
Small touches elevate a build from good to unforgettable. Here’s what works:
Furniture pieces:
- Tables: Crafted from stairs, slabs, and wood blocks
- Chairs: Use stairs backward or dark wood blocks
- Shelving: Bookshelves, dark oak fences with signs, or stair shelves
- Beds: Standard placement, or elevated on a platform
Decorative items:
- Paintings: One or two on accent walls
- Item frames: Displaying tools, weapons, or themed items
- Flowers and plants: Potted flowers (flower pots + flowers) around the space
- Barrels and crates: For organic storage appearance
- Cauldrons: Filled with colored water or potions for thematic effect
- Brewing stands: For potion-brewing atmosphere
Texture and detail:
- Place carpets on floors for warmth (different colors in different zones)
- Hang tapestries or banners from the ceiling
- Use buttons, levers, and signs as tiny decorative accents
- Add trapdoors to create visual breaks in walls
Don’t overcrowd. Hobbit holes are cozy, not cluttered. Every piece should serve a purpose or enhance atmosphere.
Lighting Your Hobbit Hole
Proper lighting is the difference between a dungeon and a home. Since hobbit holes are underground, natural light is limited, so artificial light sources must be strategic.
Lighting placement:
- Lanterns: Hang from ceiling beams or place on shelves (warm, low light)
- Candles: On tables, windowsills, or mantels (ambient)
- Glowstone: Hidden behind wood or in alcoves for directional light (avoids harsh shadows)
- Soul lanterns: Bluish tone, use sparingly for mood
- Amethyst geodes: For magical accent lighting
Lighting strategy:
- Place lights at head height (3-4 blocks up) to avoid glare and shadows
- Avoid placing lights too close to wooden ceilings (prevents fire hazard aesthetic)
- Use a mix of warm and cool tones: don’t make it monochromatic
- Create dim zones (bedroom, storage) and brighter zones (kitchen, living area)
- Test lighting at different times of day, Minecraft’s day-night cycle reveals problems
Under-lighting is the most common mistake. Your hobbit hole should feel inviting and visible, not dim and cramped. Aim for enough light that you don’t need a full brightness setting to navigate comfortably.
Advanced Details And Finishing Touches
This is where good hobbit holes become great ones. These touches separate a functional build from a show-stopper.
Exterior Landscaping And Garden Elements
The area around your hobbit hole matters as much as the entrance. The landscape tells the story of where the inhabitants live.
Garden setup:
- Create a small vegetable garden using farmland, wheat, and fence gates
- Plant berry bushes or place potted flowers near the entrance
- Add a small path leading up to the door using grass paths or gravel
- Consider a small herb garden in planters
Terrain enhancements:
- Blend the hillside into surrounding landscape using grass and dirt layers
- Add trees nearby (but not immediately in front, to keep sightlines clear)
- Scatter fallen logs or branches using wood and dark oak (place blocks at random angles)
- Create a subtle hill slope leading away from the entrance to define the “front yard”
- Add decorative stone or wood fencing to frame the entrance area
Exterior features:
- Chimney: A column of dark wood or stone rising from one side of the roof, venting “smoke” (use dark particles mod if available)
- Window boxes: Trapdoors or fence gates with flowers in item frames above
- Weathering: Use vines, moss carpets, or stripped logs to suggest age
- Stepping stones: A path of wood or stone leading to the entrance
Environmental storytelling:
- A small bench outside for relaxing
- A lantern post near the entrance for evening visibility
- Scattered items hinting at hobbit life (a broom leaning against the wall, a small wooden sign)
These details create immersion. Players should feel like a real hobbit lives here, not just a Minecraft structure.
Custom Details For Realism
Final touches that transform a build into a masterpiece:
Interior micro-details:
- Portraits or maps: Displayed using item frames
- Kitchen utensils: Hanging from hooks made of fences
- Books and scrolls: Stacked on shelves (displayed using item frames with book and quill items)
- Armor stands: Dressed as hobbit NPCs or holding tools
- Redstone contraptions: A hidden door mechanism using pistons and buttons (subtle, not obvious)
Weathering techniques:
- Use moss blocks strategically to suggest dampness and age
- Place vines on interior walls to suggest moisture
- Create subtle color variation using different wood types
- Add age cracks: small gaps in wood or stone walls filled with darker materials
Narrative elements:
- A “trophy room” with paintings and item frames showing adventures
- A craft room with tools and materials
- A comfortable reading nook with bookshelves and carpet
- Personal touches: a favorite weapon displayed, a map on the wall
When building advanced details, reference real builds on platforms like popular gaming guides and build inspiration to see how experienced builders handle these elements. The best builders obsess over tiny details because they multiply into an impressive whole.
Common Mistakes To Avoid
Learning from others’ errors saves you hours of frustration. Here are the most frequent hobbit hole build mistakes:
Proportions are off:
- Mistake: Making the entrance too small or the interior too tall
- Solution: Entrance should be 4–5 blocks wide, interior 3–4 blocks high. Test by placing your player model in the space
Using bright colors:
- Mistake: Using lime, yellow, or light blue blocks “for contrast”
- Solution: Stick to browns, grays, greens, and earth tones. Contrast comes from wood vs. stone, not from clashing colors
Ignoring the hill:
- Mistake: Digging into flat terrain instead of a hillside
- Solution: Always build into terrain you found: the landscape should support the structure, not fight it
Cramped interior:
- Mistake: Making rooms too small or ceilings too low
- Solution: Aim for 6–8 blocks wide, 3–4 blocks tall. It should feel cozy, not suffocating
Underestimating lighting:
- Mistake: Using too few light sources, creating dark, unwelcoming interiors
- Solution: Place lights every 8–10 blocks. Your hobbit hole should be brighter inside than outside at night
Forgetting the roof:
- Mistake: Leaving the top of the hill flat and exposed
- Solution: Create a mounded roof extending from the entrance, finished with grass and earth materials. This makes it feel like part of the landscape
No ventilation for the chimney:
- Mistake: Building a fireplace with no chimney, or a chimney that doesn’t connect
- Solution: Route the chimney vertically from your fireplace to the exterior roof
Too much symmetry:
- Mistake: Building a perfectly mirrored structure
- Solution: Add irregularities: one wall thicker, windows offset, entrance slightly angled. Nature isn’t symmetrical
Forgetting functionality:
- Mistake: Building something beautiful that’s unusable (no room to move, doors that don’t open, etc.)
- Solution: Test movement and functionality before finishing. You should be able to walk around comfortably and use all furniture
Inspiration And Creative Variations
A basic hobbit hole works, but variations let you make it your own. Here are proven approaches:
Multi-room expansions:
Instead of one main room, excavate multiple connected chambers. A kitchen alcove connects to a dining area, which opens into a living room, which leads to a bedroom suite. Each room can have different ceiling heights and materials, creating natural flow.
The hillside compound:
Build multiple hobbit holes connected via underground tunnels, simulating a neighborhood. Each hole has unique décor, but they share a cohesive style. This works great for multiplayer servers or single-player world-building.
Luxury hobbit hole:
Upgrade materials: replace simple wood with stripped wood, add dark oak accents, include a library wing with floor-to-ceiling bookshelves, incorporate a soaking tub (deep water block in a marble enclosure), add a meditation garden with water features and flowers.
Survival-ready hobbit hole:
Integrate functionality: a storage room with chests organized by material type, a basement furnace room for smelting, a brewing station, a work area for armor and tool repair. Make it look thematic while serving gameplay needs.
The “cozy inn” variation:
Build it larger with multiple guest rooms, a main common area with tables and seating, a bar counter, and an owner’s private quarters. Light it warmly and furnish it densely for a welcoming tavern aesthetic.
Hybrid builds:
Combine hobbit hole architecture with other structures. A hobbit hole entrance leading to a vast underground base. A hobbit house above ground with a hobbit hole exterior, but modern Minecraft interior. Mix themes to match your server’s aesthetic.
For build guides and step-by-step walkthroughs on complex variations, check resources like comprehensive game building guides which offer tier lists and detailed breakdowns of popular building styles.
Modding considerations:
If you’re using mods (Minecraft Bedrock or Java Edition with mods), you gain access to curved blocks, custom textures, and specialized building tools that make hobbit holes even more detailed. Consider exploring mods after you’ve mastered the vanilla version, it’s more rewarding that way.
Conclusion
Building a Minecraft hobbit hole is an investment of time and creativity, but the payoff is substantial. You end up with a structure that’s both visually stunning and deeply personal, a home that reflects your aesthetic and effort.
Start by finding the right terrain and preparing your materials. Build the entrance carefully, since it sets the tone for everything that follows. Excavate the interior with proportions in mind, furnish it thoughtfully, and finish with details that tell a story. Avoid common pitfalls like poor lighting and oversized spaces, and don’t be afraid to iterate, your first attempt teaches you skills that make the second attempt far better.
The beauty of a hobbit hole is that it works at any scale and skill level. Beginners can build a simple single-room version: experienced builders can create sprawling underground complexes. The style accommodates both vanilla survival and creative mode, modded and unmodded gameplay.
Once your hobbit hole is complete, you’ll have a unique landmark in your world, a place that feels lived-in, charming, and unmistakably yours. Whether you’re exploring through screenshots, inviting friends to visit, or simply enjoying your personal sanctuary, the effort transforms Minecraft from a collection of blocks into a place with character and soul. Now grab your pickaxe, find a suitable hillside, and start building.


