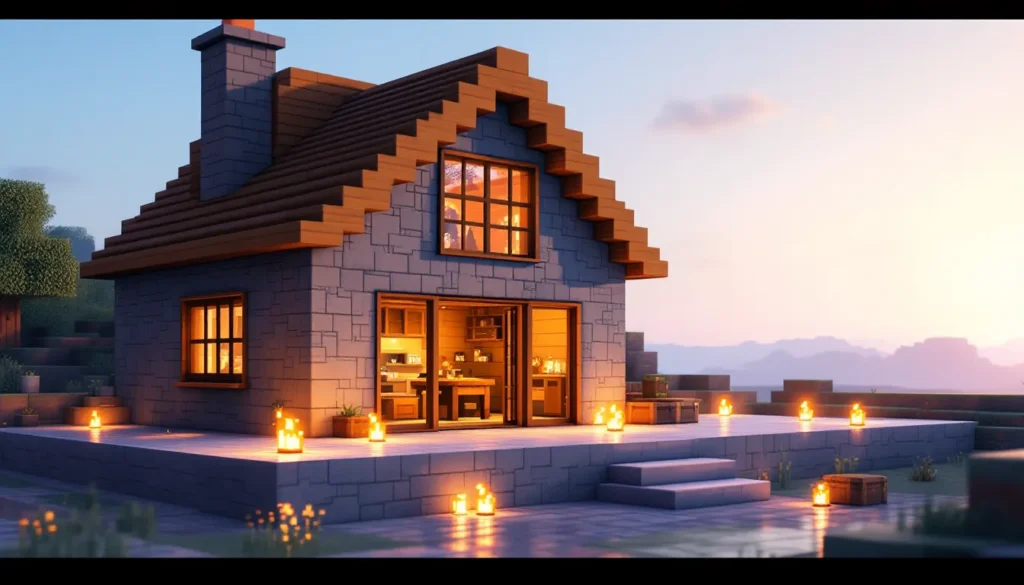

Your first night in Minecraft can feel like standing at the edge of a cliff. You’ve got nothing but your fists, darkness is falling, and hostile mobs are spawning. Building a starter house isn’t just about having a place to sleep, it’s about establishing a foothold in survival mode, creating a safe space where you can gather resources, craft tools, and plan your next moves without constantly looking over your shoulder. Whether you’re playing on Java Edition, Bedrock, or a multiplayer server, a solid starter house is the difference between thriving in Minecraft and restarting your world for the tenth time. This guide walks you through everything you need to know to construct a functional, defensible, and reasonably attractive first base that’ll serve you well from day one through your first major progression milestones.
Key Takeaways
- A starter house Minecraft base is your survival hub where you craft tools, store loot, and create a defensible safe space from hostile mobs during nighttime.
- Choose flat, open terrain near diverse biomes and essential resources like wood and water to maximize efficiency and minimize resource-gathering time.
- Prioritize crafting your crafting table and furnace first, as these two blocks enable nearly all other crafting and survival progression in early gameplay.
- Proper lighting with torches every 6–8 blocks around your exterior and throughout your interior is non-negotiable—it prevents mob spawning and keeps your base secure.
- Organize your interior with dedicated zones for crafting, storage, and sleeping; a simple 10×10 cottage design remains effective while looking more polished than a basic wooden box.
- Avoid common mistakes like building in darkness, starting too large, inadequate door placement, and poor storage planning—these errors waste time and create long-term frustration.
Why Your First Minecraft Base Matters
A starter house isn’t just convenience, it’s survival strategy. Without a proper base, you’re exposed to creepers, skeletons, zombies, and worse on every night cycle. More importantly, your first base becomes your operational hub. It’s where you’ll log back in after dying, where you’ll store your loot, and where you’ll craft the tools needed to venture further into the world.
Players often underestimate how much time they’ll spend at their starter base. Even once you build a fancy castle or underground megabase later, you’ll remember fondly those early days at your first house. It shapes how you play. A well-organized starter house with dedicated crafting, storage, and sleeping areas keeps you efficient. A poorly planned one wastes time and leaves you frustrated.
The psychological aspect matters too. Minecraft survival can feel chaotic at first. Having a home base provides psychological grounding, a sense of progress and safety that makes exploring the world feel less daunting. When you’re low on health or resources, there’s always somewhere to retreat to.
Choosing the Right Location for Your Starter House
Location makes or breaks your starter house setup. A poor location means constant mob problems, difficult resource gathering, and limited expansion room later. The right location sets you up for long-term success.
Finding Flat, Safe Terrain
Flat terrain is non-negotiable for a starter base. Flat ground means you can build quickly without extensive terraforming, and you won’t waste resources on complex foundations. Look for plains, taiga, or desert biomes, these typically have the flattest spawn chunks. Avoid mountains, cliffs, and heavily forested areas unless you’re specifically planning to use those features.
Safety matters equally. Avoid building directly next to water if possible, mobs can spawn in and around water at night, and you don’t want drowned zombies wandering toward your base. Hills are risky too: mobs can approach from above or navigate down slopes easily. A flat, open area with good visibility gives you early warning if danger approaches.
Check the light level around your chosen spot. Areas with natural light sources (torches from villages, lava flows) aren’t ideal because hostile mobs might spawn in shadows. Building on a completely flat plain ensures you control all lighting around your base.
Proximity to Resources and Biomes
Your starter house needs to be close enough to essential resources that gathering doesn’t become a chore. Ideally, you want wood sources within a few blocks, oak, birch, and spruce trees are abundant and straightforward to harvest. Water should be nearby for the crafting table, furnace, and water bucket mechanic, plus future irrigation projects.
Consider biome diversity too. A location between two or three different biomes gives you access to varied resources without long journeys. For example, positioning yourself between plains and forest means wood and grass seeds without traveling far. Near a desert gives you access to sand and sandstone. Don’t build on a tiny island in the middle of an ocean, you’ll struggle for basic materials.
Mining access is another factor. If you’re building on relatively flat terrain, you’ll dig down for stone, coal, and eventually deeper ores. Ensure you’re not building somewhere that would require massive excavation to reach good mining depth. Most starter bases do fine at Y-level 0 to 50 for early-game mining operations.
Essential Materials and Tools You’ll Need
You can’t build without resources. Understanding what you need and how to get it prevents wasted time and failed building attempts.
Basic Building Blocks and Supplies
Wood is your first priority. Punch trees with your bare fists, collect wooden logs, and open your inventory to craft wooden planks. You’ll need planks for your crafting table, sticks for tools, and basic building blocks. Collect at least a stack of logs (64 blocks) before settling on your location, you’ll burn through wood faster than expected.
Stone becomes your primary building material once you have a stone pickaxe. Early stone gives your house a more finished appearance than dirt or wood alone, and it’s functionally superior. But, getting stone requires a wooden pickaxe first, which requires crafting sticks and planks.
Dirt is your friend during early building. Don’t dismiss dirt blocks, they’re quick to gather and perfect for temporary walls, pathways, or terraforming. Many experienced players use dirt for foundation work, then upgrade to stone or wood later.
Collect extra building blocks like sand, gravel, and clay if you want aesthetic variety. These don’t affect function but improve appearance significantly. If you’re near water, gather sand for glass production later.
Crafting Your First Tools
Your progression follows a strict order. First, punch trees and get planks. Then craft a crafting table (place 4 planks in a 2×2 pattern). Place your crafting table and open it. Now you can craft sticks and a wooden pickaxe.
With your wooden pickaxe, mine stone (mine stone blocks, not cobblestone from deeper mining, stone occurs naturally on the surface). You need at least 3 stone blocks to craft a stone pickaxe, which is essential. A stone pickaxe can mine iron ore, which wooden and stone picks cannot.
Once you have a stone pickaxe, mine iron ore from underground (usually found below Y-level 72). Smelt iron in a furnace (craft one with 8 stone blocks) using coal for fuel. You’ll want at least 15-20 iron ingots for an iron pickaxe, iron tools, and iron armor basics. An iron pickaxe is your gateway to diamond mining and significant resource upgrades.
For a starter house specifically, prioritize your crafting table and furnace above all else. These two blocks enable almost everything else. Have them set up inside your house before building the roof.
Starter House Design Ideas for Different Building Styles
Your starter house should reflect your building style while remaining simple enough to complete in a session or two. Here are three popular approaches, each with distinct advantages.
Simple Wooden Box Design
The classic wooden box is a meme in the Minecraft community, but there’s a reason it works, it’s fast, effective, and requires minimal planning. A 7×7 or 8×8 wooden structure with a flat roof can be built in under an hour and provides enough space for a furnace, crafting table, bed, and storage chests.
Plans: Create a rectangular outline with wooden planks or logs. Make walls 3 blocks tall minimum (mobs can’t jump higher than 1.5 blocks, but extra height prevents them from reaching your roof). Add a simple wooden door on one side and a flat wooden roof. Leave room inside for furniture.
Advantages: Speed of construction, minimal material requirements, and clear sightlines for mob detection. Wooden boxes are defensible as long as you keep the door closed and maintain proper lighting inside.
Disadvantages: Aesthetic appeal is low, and wood burns if you’re careless with lava. Many players graduate from wooden boxes quickly and feel embarrassed about their first build.
Cottage-Inspired Layout
A cottage-style starter house adds character while remaining straightforward to build. Think small stone cottage with a peaked roof, windows, and some decorative elements. These typically measure 10×10 blocks externally and look significantly more polished than a box.
Plans: Use stone or stone bricks as primary blocks, add wooden trim around windows and doors, and create a peaked roof using stairs and slabs for visual interest. Include 1-2 windows on each wall for visibility and aesthetics.
Advantages: Much better looking than a wooden box, still reasonable to build within a few hours, and cottage designs scale beautifully, you can expand them later. Stone is more fire-resistant and looks more permanent.
Disadvantages: Slightly more complex, requires more planning, and you need to gather stone before starting. If you don’t have an iron pickaxe yet, getting enough stone can be tedious.
Modern Minimalist Approach
Minimalist designs emphasize clean lines, open interiors, and strategic use of materials. Think concrete, dark wood, and large window panes creating a contemporary feel. These houses often look sleek and sophisticated, appealing to players who want function and style.
Plans: Use dark wood (dark oak or spruce) and stone variants as your palette. Incorporate full glass panels for massive windows. Vertical lines from dark wood frames contrast with light stone walls. Keep the roof simple, flat designs or slight slopes work better than sharp peaks.
Advantages: Incredibly modern-looking, allows for excellent interior lighting through windows, and scales well for future expansion. Minimalist designs feel less cramped than boxes even though similar footprints.
Disadvantages: Requires more glass crafting early on, needs careful lighting management to prevent dark corners, and less traditional, some players prefer classic cottages. The aesthetic can feel cold if not executed carefully.
Step-by-Step Building Your Starter House
Now let’s build. This section uses a 10×10 cottage-style house as an example, but the principles apply to any design.
Foundation and Walls
First, choose your exact build location and mark out your footprint. Use dirt or temporary blocks to outline 10×10 blocks. This takes 30 seconds but prevents mistakes later.
Start by placing your perimeter. Decide on primary material, stone is ideal, but wood or wood variants work fine. Place blocks in a 10×10 outline at ground level. You want a solid perimeter at least 5 blocks high to deter mobs. Build walls on all four sides.
Leave a 2-block-wide gap on one side for your door. Don’t place the door yet: you’ll add it after walls are higher. As you build walls, plan where windows will go, typically one window centered on two walls, two windows on the longest walls.
Once your walls reach 5 blocks high (you’re standing inside looking up), it’s time to add a roof. But first, check your interior space. You should have a 8×8 interior (since walls take up space). This is plenty for starting purposes.
Adding a Roof and Windows
Roof design depends on your chosen style. For a cottage, a peaked roof using stairs and slabs looks classic. For minimalist, a flat roof with a thin overhang is superior.
For a peaked cottage roof: Create a ridge line down the center of your house. Place stairs (slope facing inward) on the outer edges going upward toward the center. The peak should be at the center line. This creates an A-frame appearance. Fill any gaps with slabs or stairs to close it completely.
For a flat roof: Simply place a solid layer of blocks on top of your walls. Add a 1-block overhang on all sides for aesthetic depth.
Windows go in next. Break out 1 or 2 blocks from wall spaces and place glass panes. For glass, you’ll need sand smelted in a furnace. If you haven’t got glass yet, you can install windows after, but it’s better to do it now.
Place your door frame opening and add an actual door. Wooden doors swing open inward, making them perfect for starter houses. Make sure your door is at least 2 blocks tall (standard height).
Interior Layout and Essential Rooms
Inside, you need a specific arrangement. The crafting table should be in a central location or one corner, this is your primary work station. Place your furnace next to the crafting table: you’ll access these two blocks constantly.
A bed is mandatory. Place it against a wall: you’ll respawn here if you die. Putting the bed in a separate sleeping chamber (even if it’s just a small enclosed corner) is psychologically better and keeps mobs from spawning directly on your bed.
Storage comes next. Place chests along one wall, initially, one large chest or two side-by-side double chests will suffice. Leave enough space to open chests without obstruction. As you collect items, you’ll appreciate efficient chest placement.
Leave some open floor space in the middle. This becomes your hub where you can move around, access multiple crafting stations, and feel less cramped. A 10×10 interior with smart placement should feel spacious, not claustrophobic.
Consider a second room or loft for future expansion. If your house is 10×10, adding an internal wall to create a “sleeping quarters” section and a “workshop” section organizes your space logically. When you’re ready to expand, you’ll already have a framework.
Protecting Your Base From Mobs and Threats
A beautiful starter house is useless if mobs wander inside at night. Defense is non-negotiable.
Lighting and Safety Systems
Hostile mobs spawn in darkness. Lighting is your first line of defense. Place torches everywhere, on walls, ceilings, around the exterior. You need at least one torch every 12 blocks to prevent mob spawning. Inside your house, place torches liberally on walls. Outside, create a ring of torches around your base.
Torches are crafted from sticks and coal (or charcoal, which is smelted wood). Early game, torches are your most valuable item. Carry them constantly and place them along paths, building sites, and any dark area.
For exterior defense, create a well-lit perimeter. A torch every 6-8 blocks in a circle around your house prevents mob approaches significantly. Many players create a 20-30 block clear zone around their starter house with torches placed strategically. This gives you visual warning if mobs are approaching.
Lanterns and other light sources (glowstone, once available) are superior aesthetically but require resources you might not have early. Stick with torches until you’re established.
Doors, Walls, and Defensive Structures
Your door is critical. A wooden door works fine, mobs can’t open wooden doors. Iron doors require redstone and buttons, making them overkill for a starter house. Keep your wooden door closed at night, and you’re safe.
Earth walls or elevated platforms provide additional security. Some players dig a small moat (one block deep, one block wide) around their house as a psychological barrier and slight mob deterrent. Mobs can path around it, but it forces them to traverse awkward terrain.
Elevating your starter house one or two blocks on a platform (placing blocks under your structure) prevents mobs from climbing up to your roof. Mobs can traverse most vertical surfaces, but a 2-block elevation is enough to deter passive wandering.
Add a fence or wall gate if you plan to leave your front door area open for aesthetic reasons. A 2-3 block high fence surrounding your house prevents mobs from casually walking toward your door. The gate gives you controlled entry.
Once you’re comfortable, consider adding a covered porch or entry hallway. This small structure (3-4 blocks deep) protects your main door from direct mob approach and creates a transitional zone. Light it well, and mobs won’t spawn inside it.
Interior Essentials: Storage, Crafting, and Living Space
Your interior is your workshop. Organization here dramatically impacts efficiency and enjoyment.
Setting Up Your Crafting Area
Your crafting table and furnace are the nucleus. Place them adjacent to each other so you’re not running between corners. Stand between them and you should be able to access both without moving. This saves immense time when you’re repeatedly crafting sticks, cooking food, or smelting ore.
Add a chest next to your crafting area, this becomes your “work in progress” chest. Place gathered resources here before organizing them into long-term storage. This prevents your main inventory from clogging with raw materials.
If you have multiple furnaces, organize them by purpose. One furnace for food, one for ore smelting, one for fuel production (cooking wood into charcoal). Early game, one furnace handles everything, but the separation helps once you’re established.
Consider a dedicated wall for your crafting supplies. Hang tool sets here, keep your pickaxes, shovels, axes, and swords organized on a visible wall using item frames or hanging from a display. This isn’t necessary but makes early-game feel more organized.
Creating Efficient Storage Solutions
Storage organization prevents madness. In survival mode, without organization, you’ll spend 10 minutes looking for a specific item you know you have.
Start simple: one large double chest for miscellaneous items, one for building blocks, one for food. As you accumulate, expand to more specific categories: ores, logs, processed materials (ingots, etc.), and enchanting supplies.
Label your chests using signs if you’re on Java Edition. This is obvious but crucial, a simple sign reading “WOOD” or “ORES” saves future headaches.
For your first few hours, don’t overcomplicate storage. A 2×2 arrangement of double chests (four chests total) organized by broad category handles early-game content perfectly. The urge to create a massive sorting system is tempting, but starter houses don’t need it.
Keep your most-used items (pickaxes, shovels, sticks) in your hotbar or a dedicated accessible chest. Items you rarely touch (decorative blocks, certain ores) can be in less convenient storage.
Bedroom and Respawn Point
Your bed is survival-critical. When you die, you respawn at your bed’s location (unless the bed is destroyed or blocked). Place your bed somewhere safe, ideally in an enclosed sleeping chamber away from main activity.
Surround your sleeping chamber with walls to create a dedicated bedroom. This doesn’t need to be fancy: even a 5×5 alcove sealed off with a door works. Keep a torch or two so the room doesn’t spawn mobs while you sleep.
Some players place multiple beds in different corners of their house. If one bed gets destroyed or something goes wrong, you have backups. In multiplayer, everyone needs a bed, so plan accordingly.
Right-click your bed before night falls to sleep through the night. Your character will wake automatically, and night cycles pass instantly. Without sleeping, the only way to pass night is staying awake for roughly 20 real-world minutes of gameplay.
Expanding Your Starter House as You Progress
Your starter house doesn’t have to stay small. Expansion is natural and encouraged. Plan from the beginning for growth.
Adding Workshops and Farms
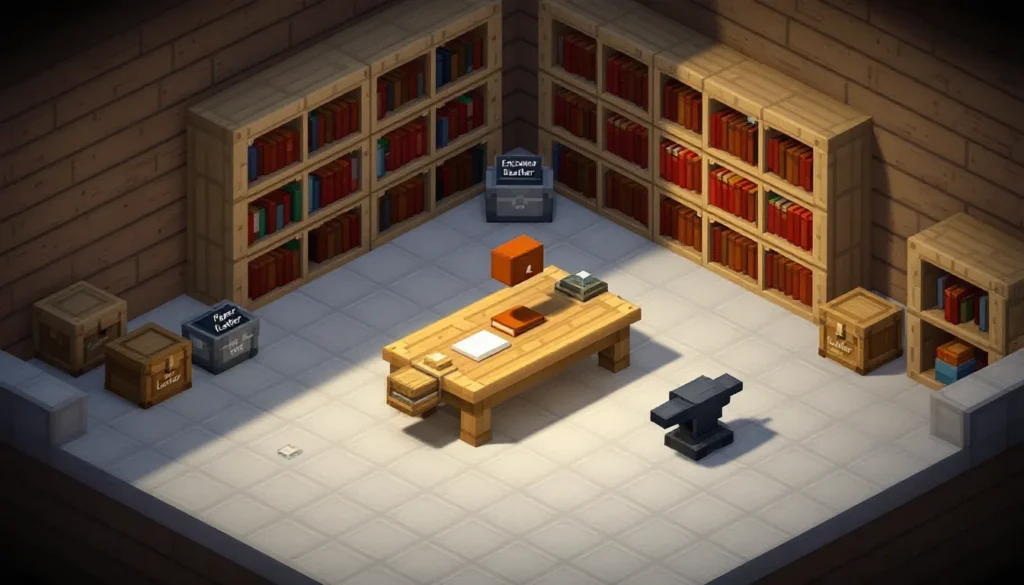
Once you’re past the survival rush, dedicated workshops transform your base. A enchanting room requires bookshelves and an enchanting table, build this near your crafting area. A potion brewing room needs brewing stands, cauldrons, and ingredient storage. These add depth without overwhelming beginners.
Farming becomes essential for long-term survival. Create a farming area (outdoors or in a dedicated indoor section) with rows of crops. A simple 10×10 dirt area with water channels produces enormous amounts of crops with minimal effort. Early game, you don’t need this, but once you’re comfortable, farming prevents hunger problems.
A mob farm or experience farm is optional but powerful mid-game. These require redstone knowledge but provide unlimited experience for tool enchanting. They’re complex, so build these after your starter house is solid.
Place these additions adjacent to your starter house rather than integrated. This creates a compound structure where your original house remains the central hub, with workshops radiating outward.
Creating Aesthetic Outdoor Areas
Once survival is secure, aesthetics matter. Outdoor areas transform your base from functional to beautiful.
Add a small garden with decorative plants, flowers, and tree lines. A few lanterns, path lights, and landscaping turn dirt surroundings into a homestead. This takes time but has zero survival impact, purely quality-of-life improvement.
Create pathways using dark wood, stone, or gravel connecting your starter house to farming areas and mining sites. Torches along pathways look professional and serve functional purposes.
Add a front porch or entrance plaza. Nothing complicated, just a wooden platform, a few chairs (stairs work as seating), and decorative elements. This makes your starter house feel intentional.
Consider a small lookout tower or flag to make your base visible from far away. This helps orientation when exploring and looks cool. A 2×2 tower with platform and flag takes 30 minutes and serves practical and aesthetic purposes.
Common Starter House Mistakes to Avoid
Learning from others’ mistakes accelerates your progress. Here are critical errors that plague new players.
Building in darkness without torches: Too many starters mine stone, build walls, and forget to light their construction site. Mobs spawn instantly. Light as you build, not after.
Inadequate door placement: An open entrance invites mob incursion. Make your door recessed slightly or add a covered entry. Simple design prevents major problems.
No separation of function zones: Cramming your bed, furnace, crafting table, and storage in one chaotic room creates inefficiency. Separate these into distinct spaces, even if they’re all in one building. Movement matters.
Starting too big: Overambitious designs lead to incomplete houses and frustration. Build a 10×10 cottage, not a 30×30 manor. Complete your starter house first. Expansion happens naturally.
Placing the house in suboptimal location: Building on an island, next to cliffs, or in a dark forest creates constant friction. Spend 10 minutes finding a better location. The time investment pays dividends.
Forgetting windows: A house without visibility feels like a bunker. Windows aren’t purely aesthetic, they let you see outside at night before opening doors. Include at least two windows.
Using flammable materials near lava: Wood burns. If you’re building near lava or in a nether structure (later game), use stone or fireproof materials. Wooden houses and lava don’t mix.
Poor storage planning: Players who jam items randomly into chests spend endless time searching. Organize from day one. It takes 30 seconds to arrange chests logically and saves hours of frustration.
Neglecting mob defense: Lighting is cheap: regenerating after a creeper explosion is expensive. Defend your base properly. Better over-lit than under-lit.
Building too close to spawn: If you’re playing on a server or multiplayer world, verify your house location isn’t near the spawn area. You’ll have constant interruptions from other players.
Conclusion: Building Your Foundation to Success
Your starter house is the foundation of everything that follows. It’s not about perfection, it’s about creating a functional, safe space where you can gather resources, learn game mechanics, and plan your next adventures. The players who succeed in long-term Minecraft survival aren’t those with the fanciest starter houses: they’re the ones who built something solid, organized their space efficiently, and established good habits from day one.
The design doesn’t matter nearly as much as the execution. A simple wooden box with proper lighting and storage beats an elaborate mansion that’s incomplete or poorly organized. Start small, build methodically, and expand based on your actual needs rather than Pinterest inspiration.
As you gain experience, Creative Minecraft Ideas to Spark Your Next Adventure will feel increasingly inspiring. Your first base teaches you not just building mechanics but planning, resource management, and problem-solving, skills that elevate every structure you create afterward. Whether you’re playing vanilla survival, exploring with mods, or on a multiplayer server, those fundamentals transfer everywhere.
The players who remember their starter houses fondly aren’t always those with architectural masterpieces. They remember them because those early builds represent their first steps in a game that’s captivated hundreds of millions of players worldwide. So build your house, light it thoroughly, organize your storage, and enjoy the journey. Your next chapter awaits, and it starts from home.