
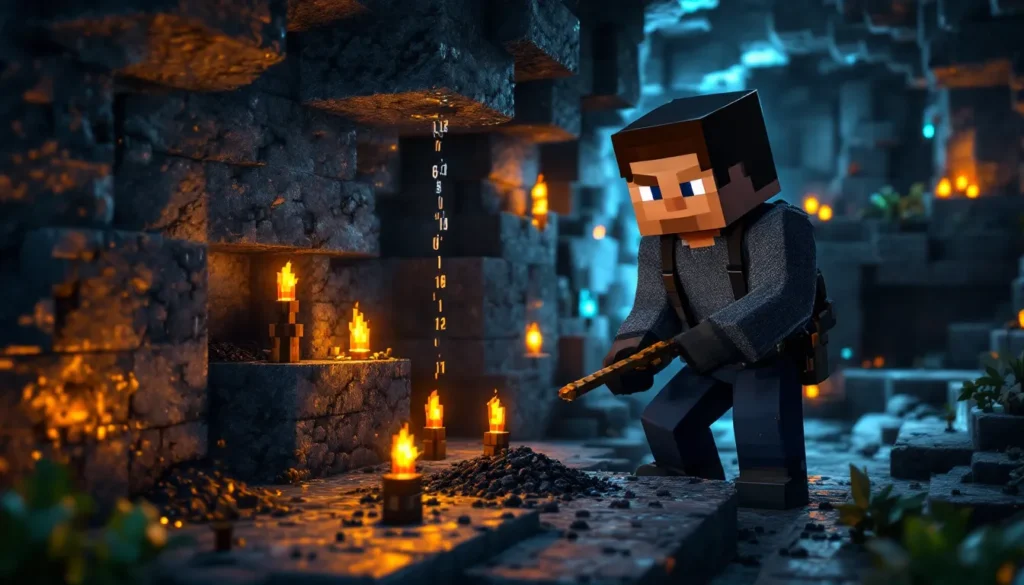

Torches are one of the first tools you’ll craft in Minecraft, and they’re easy to dismiss as a simple lighting solution. But underestimate them, and you’ll find yourself stumbling through caves, getting ambushed by mobs, and missing out on clever redstone contraptions that rely entirely on torch placement. Whether you’re a survival mode veteran or still figuring out your first night, understanding how torches work, from basic crafting to advanced logic gates, separates efficient players from those constantly scrambling for resources. This guide covers everything you need to know about Minecraft torches in 2026, including variants, placement mechanics, strategic uses, and the techniques that separate casual builds from optimized bases.
Table of Contents
ToggleKey Takeaways
- Minecraft torches emit light level 14, the brightest non-block light source, and prevent hostile mob spawning within effective range when placed consistently every 8-12 blocks in caves.
- Craft torches efficiently by combining 1 coal (or charcoal) with 4 sticks to create 4 torches, making charcoal from wood a renewable early-game alternative to mined coal.
- Strategic torch placement on one cave wall creates a foolproof navigation system to find your way back to spawn, faster and more reliable than compass checking.
- Redstone torches function as logic inverters in circuits and are essential for building automated farms, mob grinders, and complex contraptions—don’t confuse them with regular decorative torches.
- Soul torches provide light level 10 and require denser spacing (every 6-8 blocks) due to lower brightness, making them primarily aesthetic variants for Nether builds and thematic bases.
- Avoid common mistakes like spacing torches too far apart, neglecting vertical shaft lighting, and placing torches in water paths, all of which compromise safety and automation reliability.
What Is a Minecraft Torch?
A torch is a light source that emits a light level of 14, the brightest non-block source in vanilla Minecraft (only sunlight and certain blocks like glowstone output level 15). Torches are small, iconic blocks that stick out from walls, ceilings, or floors and provide ambient lighting without requiring power. They’re available across all game modes and platforms, Java Edition, Bedrock, and Pocket Edition, making them universally accessible.
Torches emit light instantly, never break due to physics, and won’t despawn. They’re one of the earliest tools you’ll craft because wood and coal are abundant. Unlike lanterns, which are purely decorative floating blocks, torches are placement-specific directional blocks that attach to solid surfaces. This makes them both functional and thematically tied to early-game survival.
How to Craft a Torch in Minecraft
Crafting torches is straightforward, but knowing the recipe and alternatives helps you optimize your resource gathering during those critical first nights.
Required Materials and Crafting Recipe
To craft a torch, you need:
- 1 Coal or Charcoal
- 1 Stick
The crafting pattern is simple: place the coal in the center of your crafting grid and surround it with up to four sticks (top, bottom, left, right, but not diagonals). Each stick produces one torch, so you’ll get 4 torches per coal and 4 sticks.
If you don’t have coal yet, burn wood logs in a furnace to get charcoal, which works identically to coal for torch crafting. Early survival runs often rely on charcoal because it’s renewable and doesn’t require mining underground. At a 4:1 ratio (sticks per coal), torches are incredibly efficient compared to other light sources like lanterns (which require iron and coal).
Alternative Torches and Variants
Minecraft 1.16+ introduced soul torches, which emit light level 10 and glow a distinctive blue-green color. Soul torches require:
- 1 Soul Soil or Soul Sand
- 1 Stick
- 1 Coal or Charcoal
These torches are primarily aesthetic but are darker in Nether environments where they blend the lighting while maintaining visibility. They’re also stackable with regular torches in redstone circuits for visual differentiation.
Lanterns (crafted with 8 iron nuggets and 1 torch) provide the same light level as torches but hang from ceilings or sit flat on blocks. They’re purely decorative upgrades and require more resources, so most players reserve them for builds where aesthetic matters over function.
Torch Placement and Mechanics
Understanding how torches physically interact with the world is crucial for both survival gameplay and advanced building.
How to Place Torches Effectively
Torches must be placed on solid surfaces: blocks, trees, fences, or walls. You can’t place them in mid-air or on transparent blocks like glass. To place a torch, aim at the block you want to attach it to, then right-click (place). The torch will stick out perpendicular to the surface.
On horizontal surfaces (dirt, stone), torches point upward at a slight angle. On vertical surfaces (walls), they jut outward. On ceilings, they hang down. Torches placed on the sides of blocks create natural-looking lighting paths through caves or around bases without cluttering the structure.
Pro tip: Holding torches while exploring lets you instantly mark your path back by placing them on walls as you go. This is faster and more reliable than breadcrumb-style item dropping.
Light Levels and Brightness Mechanics
Minecraft’s lighting system uses values from 0 (complete darkness, mobs spawn) to 15 (sunlight). A single torch emits light level 14, which prevents hostile mob spawning within a 14-block radius (though the falloff isn’t perfectly spherical, it’s more of an octahedron in Java Edition).
Multiple torches stack their light levels, but light doesn’t add linearly. Two torches next to each other don’t create level 28: instead, they ensure that the area closer to one torch stays at 14 even if you step away. This is why miners place torches every 8-12 blocks down a cave tunnel, the spacing ensures no gaps in coverage.
Soul torches emit only level 10, so they require denser placement (every 6-8 blocks) to prevent mob spawning. This is a key difference players often miss when decorating Nether bases.
Water and Fire Interactions
Torches are destroyed instantly if water flows over them, which is why water channels or flowing water in builds require torches to be placed out of the flow path. This limitation is important for mob grinders and traps that rely on water to push entities.
Torches don’t catch fire and aren’t flammable, so placing them near wood structures is safe. But, if a torch is placed next to a block that catches fire (like wood in contact with lava), the torch itself remains unharmed. The block will burn, but the torch drops as an item.
Strategic Uses for Torches in Gameplay
Beyond lighting, torches serve critical roles in navigation, safety, and base defense.
Navigation and Way-Finding
Placing torches on one side of cave walls (e.g., always on your right as you descend) creates a navigation system that’s faster than checking a compass or map. At the end of a mining run, turn around and follow the torches back to the surface. This works because torches on caves’ walls are visually distinctive from environmental blocks.
River and ocean navigation is easier with torches too. Place them on poles, pillars, or the banks at regular intervals to guide boats back to base. Some players set up torch “highways” above water, which also acts as air pockets for quick travel.
Mining and Caving Safety
Caves are the primary source of ores like diamonds and ancient debris, but darkness makes navigation treacherous. Placing torches as you descend prevents spawn zones, illuminates hidden floors and ledges, and marks explored areas. When you return to a torch-lit section, you know it’s been cleared.
Torches also reveal ravines and chasms before you accidentally fall. Lighting up a large cavern before mining prevents surprise encounters with creepers or falls into lava pools.
Mob Prevention and Base Protection
Hostile mobs (zombies, skeletons, creepers, spiders) spawn only in darkness (light levels 0-7). Surrounding your base with torches instantly makes it safer. A well-lit perimeter prevents surprise attacks and allows you to see threats coming. Many players light up their spawn area and create torch-lined pathways to farms, mineshafts, or other important structures.
Torches also block specific mob behavior. For example, witches (which are difficult to kill) have reduced spawn rates in well-lit areas. Endermen, while neutral, avoid lit areas and are less likely to pick up blocks nearby, which is useful for protecting your builds from random griefing.
Advanced Torch Techniques and Builds
Experienced players leverage torches in ways that go far beyond simple lighting.
Redstone and Torch Logic
Torches are essential components in redstone circuits and serve as not gates (logic inverters). When a redstone signal powers a torch from beneath or the side, the torch turns off, cutting its light and any redstone output. This property is foundational for:
- Logic gates: Torches form the basis of AND, OR, XOR, and NAND gates that control complex redstone contraptions.
- Pulse extenders: Redstone torches repeat signals on a timer, creating delays in automated systems like farms or doors.
- Inverters: A simple redstone torch turns a signal “on” into “off” and vice versa, enabling conditional mechanisms.
Redstone torches are slightly different from standard torches, they emit light level 7 and are used purely for logic circuits. They’re crafted identically to regular torches but behave electrically on redstone networks. Understanding torch logic is required for mob grinders, iron farms, XP farms, and any automated system.
For advanced builds, tutorials and walkthroughs available on game modding communities often include redstone torch placement diagrams that show exactly how torches enable specific circuit functions.
Aesthetic Torch Designs and Decorative Patterns
Beyond function, torches are aesthetically versatile. Placement patterns create visual interest:
- Diagonal lighting: Torches placed on alternating corners of a pathway create a natural, non-uniform lighting effect.
- Torch columns: Stacking torches vertically on a pillar creates a beacon-like structure visible from distance.
- Soul torch contrast: Mixing soul torches with regular torches creates visual separation between areas (common in Nether bases and spooky themes).
- Floating designs: Torches on trapdoors, fences, or thin supports create the illusion of floating light sources.
Torches pair well with other blocks for aesthetic value. Placing them on dark wood, stone, or metal blocks emphasizes their glow. Many builders combine torches with lanterns, candles (added in 1.17), and amethyst crystals to layer lighting at different heights and colors.
Torch Variants and Special Types
Minecraft 1.16+ introduced variants of torches that expand your lighting and building options.
Soul Torches and Soul Lanterns
Soul torches were introduced in the Nether Update (1.16) and emit a blue-green flame. They’re thematic for Nether builds and soul lanterns (hanging versions) and provide light level 10 compared to regular torches’ 14. This lower light level means mobs can spawn closer before being prevented, so soul torches are primarily decorative.
Soul lanterns require 8 iron nuggets and 1 soul torch, making them an upgrade for aesthetic bases where iron is abundant but you want that distinctive look. They’re common in Nether bases and “haunted” or “soul-themed” builds.
Jack O’Lanterns as Torch Alternatives
Jack O’Lanterns (carved pumpkins with torches inside) emit light level 15, matching sunlight. They’re crafted by combining a carved pumpkin with a torch, making them slightly more resource-intensive than regular torches. But, they’re block-shaped, not thin sticks, so they’re better for:
- Larger, visible light sources in builds.
- Creating glowing decorations without the torch stick sticking out.
- Thematic seasonal or holiday decorations.
Jack O’Lanterns also face a specific direction (toward where you’re facing when placing), which lets you create directional lighting effects. They’re overkill for pure function but excellent for showpiece bases and mega builds where aesthetics matter. For comprehensive building guides, check resources on game walkthroughs that detail decoration techniques.
Common Mistakes and Best Practices
Even experienced players make torch-related errors. Here’s what to avoid and how to maximize efficiency.
Mistake 1: Underestimating torch spacing. Placing torches too far apart creates dark pockets where mobs spawn undetected. A good rule: no more than 12 blocks between torches in caves, 8 blocks for soul torches. Test by standing in the area at night, if you see dim spots, add more.
Mistake 2: Forgetting torches in vertical shafts. Mining straight down or up creates a dark vertical corridor where mobs can hide. Light vertical shafts on all sides or place torches in a spiral pattern to eliminate spawn zones.
Mistake 3: Wasting coal early. New players craft torches excessively early and run out of coal for smelting. Use charcoal from the furnace for torches and reserve coal for cooking and crafting needs. Charcoal is unlimited (just need wood logs), coal is more valuable late-game for brewing or enchanting room aesthetics.
Mistake 4: Placing torches in water paths. Water-based transport systems (slime block launchers, water elevators, etc.) will destroy torches placed in the flow. Keep torches out of the moving water path.
Mistake 5: Ignoring light levels in redstone logic. Redstone torches function differently than regular torches. Using the wrong type in circuits causes contraptions to malfunction. Always double-check whether your circuit needs a redstone torch (logic/electrical) or a regular torch (decoration/ambient light).
Best Practice 1: Mark your path consistently. Always place torches on the same side (e.g., right wall only) when exploring. This makes returning to spawn foolproof, just follow the torches.
Best Practice 2: Light bases first, decorate later. Functional lighting prevents deaths. Aesthetic placement can come after you’ve secured the perimeter.
Best Practice 3: Use torches as temporary markers. While building, place torches to mark incomplete sections, danger zones, or areas to return to. It’s faster than signs and more visible.
Best Practice 4: Combine light sources. Mix torches with lanterns, soul torches, and candles for layered lighting that feels natural and looks professional.
Conclusion
Torches are deceptively simple, a basic resource you’ll craft hundreds of times, but mastering their placement, spacing, and variants separates efficient survival players from those constantly struggling with darkness and mob attacks. From preventing spawns to enabling redstone logic gates, torches are fundamental to both safety and automation. Whether you’re lighting your first base, creating a torch highway through a ravine system, or designing a redstone contraption, understanding light levels, placement mechanics, and torch variants ensures your builds function perfectly and look intentional.
In 2026, with expanded variants like soul torches and the continued relevance of redstone-based farming, torches remain one of the most valuable tools in your Minecraft toolkit. Start with efficient early-game torch placement, graduate to redstone logic when you’re ready, and always remember: a well-lit base is a safe base.


